Maxtrax Assembly Tips
or
What You Should Know that the Factory Didn’t Tell You
I love my new Maxtrax road course and I firmly believe that it is the best product of its type available. However, I discovered a few things while I was assembling Crystal Rock Raceway that are worth passing along. They turned what started out as a nice track into what one racer called "a super smooth addiction." I may be slightly biased but, in my opinion, that sounds about right. What I learned is provided here for your consideration.
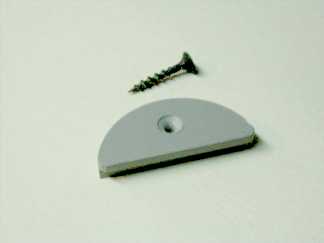
Countersinking the Biscuits
Maxtrax comes with half round plastic biscuits for securing the track to the table. The manufacturer recommends placing two of them at every joint. Sometimes that means the biscuit is placed right where a car will fly into it in a turn. The biscuits also don’t work real well on the inside of the 17" radius turns. I found that all of the biscuits are not required. The screws they supplied work fine however the biscuits are not countersunk to accept the screws. A bit of time with the drill press and a countersinking tool saved a lot of time during final assembly. As an alternative, some owners have drilled and countersunk the track and secured it directly to the table. I didn’t do that as I felt that the biscuits let the track expand and contract better with temperature changes. As the track is in a climate controlled room this is not an issue and the track has since been drilled to accept #4 Phillips flat head wood screws and is screwed directly to the table. The biscuits are now a thing of the past.
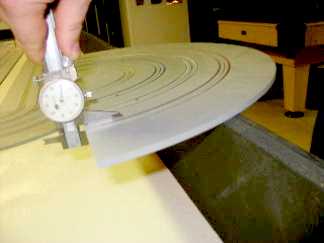
Shimming the Joints
The track is made of individual sections. If you can avoid it don’t have the track joints coincide with the table joints. Allow the track to span the table joints if possible. I found that the thickness of the track surface can vary slightly from section to section. These means bumps at the joints if not corrected. Fortunately the correction is simple. Measure the thickness of the two track sections at each joint with a dial caliper. Apply tape to the bottom of the thinner section at the joint until both sections are the same thickness. Then assemble per the manufacturer’s direction and you have an ultra smooth joint. I used 1.5" wide mylar tape at CRR. In one place I had to remove some material from the underside of a section as the thickness of the track varied from left to right in the vicinity of the joint.. The results speak for themselves as the cars just glide across the joints without making a sound.
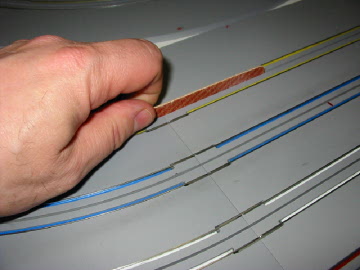
Checking Slot Width
The track is held together with metal pins at the end of each track section. These pins also tie the rails together electrically. After about a week or two I noticed that one of my Fray cars started to make a strange rubbing sound when it passed a joint at speed. On further investigation I noticed that the pins compressed the slot at the joint. The rubbing sound I was hearing was the result of the guide pin hitting both walls and binding the pin. If the pin was a bit wider the car would have stopped. A few quick passes with an emery board in the slot at each joint restored the slot to its normal width and eliminated the problem. This problem does not exist elsewhere and is not a problem with other cars. The pins on the T-jets are slightly wider than the steel pins on almost everything else and as a result only the T-jets have a problem.
Cleaning and Prep
The rails on a Maxtrax are made of a magnetic stainless steel. This material has advantages and disadvantages. One of the disadvantages of this material and how to properly minimize it is discussed here.
Conclusion
None of the above are a big deal and I would not pass up buying a Maxtrax because of them. I wanted to pass my findings along so that others can learn from my experience and have the best track possible. These little things turned a nice track into a low maintenance, ultra smooth track that is both easy on cars and a blast to drive.
Steve "Maddman" Medanic